Perhaps you have a small and intimate wedding coming up or your non-profit is throwing an event and looking to save some money. Planning an event means balancing a dozen moving parts, and adding interactive entertainment for your guests is usually high on the list. A photo booth is one of the best ways to capture candid memories, keep guests engaged, and give everyone a fun takeaway from the night.
If you are working with a tight budget or love a good weekend project, building a DIY photo booth is a viable option. In this guide, we’ll break down everything you need to build your own setup (from gear and lighting to backdrops and software) along with a few hidden challenges to keep in mind before event day.
What You Need for a DIY Photo Booth Setup
Before diving into setup, you’ll need to gather your equipment. While a DIY approach saves money on professional labor, it does require a few hardware investments to get clear, sharp photos.
Capture Device: An iPad, Android tablet, or DSLR camera. An iPad is usually the easiest choice for guest self-service. An iPad can be used with a DSLR to capture higher quality photos. You’ll need a special cable to connect the two.
Tripod & Mount: A sturdy tripod equipped with a tablet clamp to hold your device secure at eye level (around 5 feet high).
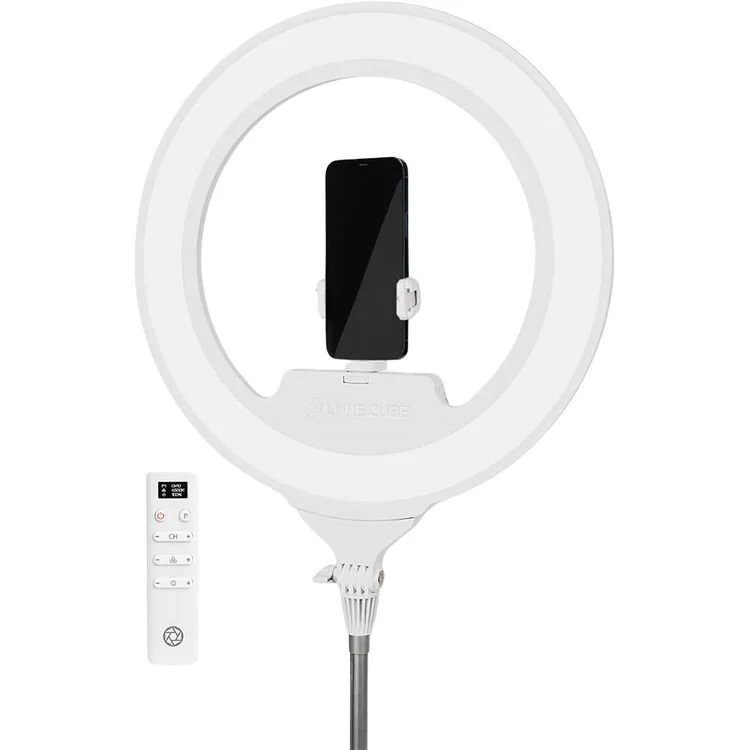
Ring Light or Softbox: Venue lighting is almost always too dim. A continuous LED ring light positioned directly behind or around the camera is essential to avoid dark, grainy photos. You can also use an on camera flash if you are using a DSLR camera. It’s generally best to diffuse this light if possible to create a soft light effect.
Photo Booth App: Apps like LumaBooth, Simple Booth, or Mini-Booth allow guests to tap the screen, start a countdown, and receive photos via text or email. Most of these apps require a paid subscription.
Backdrop & Stand: A heavy-duty backdrop stand with fabric, sequin curtains, or a custom balloon arch. We recommend backdrops without a reflective surface, cheap vinyl backdrops often reflect the photo booth lighting and result in poor quality images.
Props: Props, sign boards, hats, and glasses to encourage guests to get creative. Props can really make or break a photo booth. We definitely recommend doing something more than basic stick props.
Here is a list of product recommendations for a basic iPad and ring light booth (no DSLR camera or studio lighting):
iPad Mini $569
Professional Gaff Tape $39.99
Sandbags $32.98
Photo backdrop $30-250
4 Steps to Set Up Your DIY Photo Booth
Step 1: Pick the Right Location
Position your setup near high-foot-traffic areas, (like near the bar or dance floor) but out of main walkways. Ensure your spot has access to a dedicated power outlet so your tablet and lights don’t die halfway through the party. Avoid setting up directly in front of bright windows, which can create harsh backlighting and dark silhouettes. We recommend finding a space that is about 10x10 feet in size. You can fit into a smaller space but this will limit the number of people who can fit into each photo. Big group photos in a photo booth are always the most fun!
Step 2: Dial In Your Lighting and Camera Height
Set your tablet tripod roughly 6 to 8 feet away from the backdrop. Mount your ring light at eye level to eliminate harsh facial shadows. In your photo app settings, lock the exposure and focus so the camera doesn’t constantly adjust every time someone walks up. If you’re using a on camera flash unit we recommend placing this slightly above eye level.
Step 3: Secure the Backdrop
Make sure your backdrop frame is weighted down, especially for outdoor events or lively indoor venues. Sandbags or heavy water weights placed on the base legs prevent guests from accidentally knocking the entire setup over while posing. If you’re setting it up outdoors, we highly recommend placing it inside of a pop up tent to give both your backdrop and your booth some added stability. This will also protect from any inclement weather or direct sunlight. Direct sunlight is so bright that it will blow out your photos and make them unusable. It’s best to have guests standing in a shaded area with diffused light when shooting outdoors.
Step 4: Configure Digital Sharing
Set up your chosen photo app to send digital images via SMS or email. Make sure your venue has reliable Wi-Fi, or connect your tablet to a mobile hotspot so guests can receive their photos instantly. You can also use the hotspot on your phone if you’re able to leave your phone near the booth during the event.
The Hidden Costs & Challenges of DIY
While building your own photo booth is a fun project, host responsibilities don't end once the event starts. Here are a few common friction points event hosts encounter on the big day:
Equipment & Subscription Costs: Buying a quality ring light, heavy-duty tripod, backdrop stand, props, and app subscriptions often adds up to $300–$500+ before you even start building.
Troubleshooting During the Party: If the Wi-Fi drops, the app crashes, or the ring light unplugged, someone on your planning team has to stop celebrating to fix it.
No Physical Prints: Printing on-site requires a fast sub-dye photo printer and media kits. Standard home inkjet printers are far too slow and quickly run out of ink, limiting most DIY setups to digital-only sharing. We use the DS-RX1 photo printer for our events. This printer alone starts at $700 with a box of print media for it running around $200.
Lighting Shifts: As day turns to night, ambient venue light changes dramatically, which can require mid-event adjustment to camera settings. We use high quality studio flash units that outcompete ambient lighting. This solves this issue but these flash units start at around $400 and require a DSLR camera and knowledge of professional photography settings.
DIY Photo Booth vs. Hiring a Professional
If you're deciding whether to build your own booth or hire a local photo booth company, consider how much hands-on management you want during your event:
| Feature | DIY Photo Booth | Professional Photo Booth Rental |
|---|---|---|
| Best For | Casual backyard BBQs, small birthday parties, tight budgets | Weddings, galas, corporate brand activations, trade shows |
| Setup & Teardown | 2 to 3 hours of buying gear, testing apps, and manual assembly | 100% turnkey delivery, professional setup, and teardown |
| Print Quality | Digital sharing only (or slow consumer home printing) | Studio grade lighting & instant lab quality thermal prints |
| Guest Experience | Self serve; guests troubleshoot technical issues | Full time on-site attendant keeps lines moving & assists guests |
| Customization | Basic app templates | Custom branded print overlays, live gallery, and instant sharing |
| Your Time Invested | 4 to 6 hours of prep and management | 0 hours |
Ready for a Stress-Free Event Experience?
Building a DIY photo booth is a great weekend project if you love tinkering with tech and have extra prep time to spare. But if your event checklist is already overflowing and you want studio-quality lighting, instant custom prints, and zero stress on your big day, working with a professional team is the easiest path forward.
At PDX Photo Lounge, we handle everything, from custom overlay designs and premium backdrops to turnkey setup and on-site attendants, so you can focus on enjoying your event.
Explore Our Photo Booth Packages or Contact Us Today to check availability for your date!